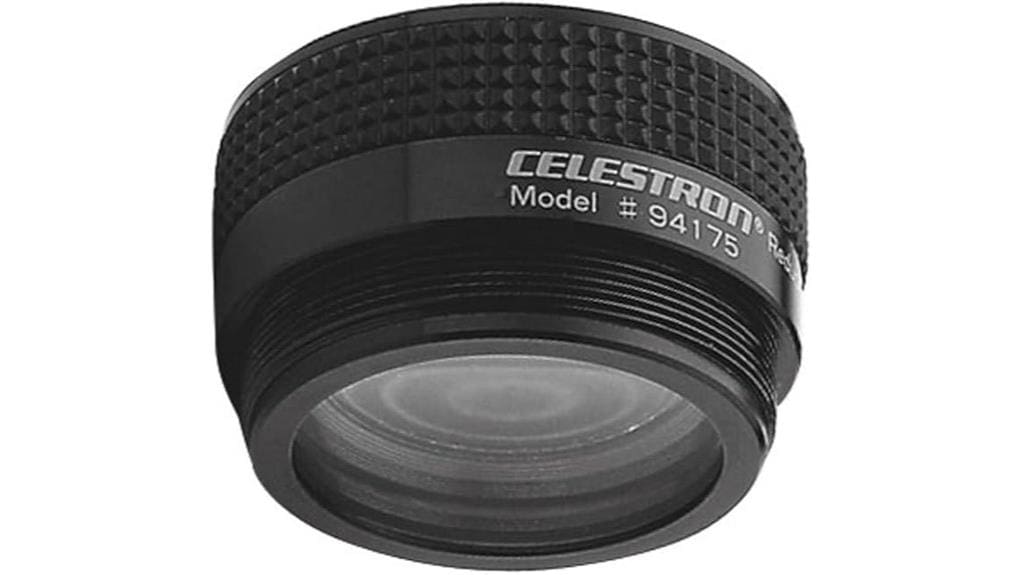

You’ll cut effective focal length and f‑ratio by 37% (e.g., f/10→f/6.3), so exposures shorten and your instantaneous field widens for deep‑sky work. The multi‑element design flattens the focal plane and multi‑coatings keep high transmission and near‑full‑field illumination, though small decenter or thermal shifts can nudgе spot size and corners on full‑frame. It mates cleanly to Celestron SCT back ends and demands careful backfocus and manual focusing; keep going and you’ll find detailed setup, tests, and tradeoffs.
Some Key Takeaways
- Reduces focal length and f-ratio by 37% (e.g., f/10 → f/6.3), cutting exposure times and widening field of view.
- Multi-element field corrector flattens focal plane and minimizes coma, preserving sharp center and most of the field for imaging.
- Fully multi-coated optics deliver high transmission and near-full-field illumination, though small decenter or thermal shifts affect spot size.
- Best suited for Celestron SCTs and mirrorless cameras with proper adapters; careful backfocus measurement and shimming optimize performance.
- Trade-offs: faster, wider imaging with mild corner elongation on full-frame sensors; consider smaller sensors or cropping for pristine corners.
What the Celestron Focal Reducer & Field Corrector Actually Does and Who Should Buy It
When you attach the Celestron Focal Reducer & Field Corrector to a Schmidt-Cassegrain telescope, it shortens the effective focal length and lowers the focal ratio by 37% (for example, f/10 → f/6.3), giving you a wider, faster optical system that preserves full-field correction for imaging. You’ll gain wider fields useful for deep-sky targets and faster exposures for shorter integration times. For visual framing you’ll notice reduced magnification and improved field coverage; plan eyepiece pairing to avoid vignetting and maintain eye relief. Buy it if you need efficient astrophotography or versatile visual/terrestrial use with SCTs. Mirrorless camera enthusiasts will appreciate pairing mirrorless cameras with appropriate adapters to maximize imaging flexibility.
Key Specs and Real-World Performance: Optics, Reduction, Field Correction, and Coatings
Because the reducer is designed to cut focal length and correct the field simultaneously, you’ll see tangible optical benefits: a 37% reduction (f/10→f/6.3) shortens exposure times and widens instantaneous field-of-view while the multi-element corrector flattens the focal plane to minimize edge astigmatism and coma for modern sensors. You’ll measure near-full-field illumination and high transmission thanks to fully multi-coated elements; evaluate coating durability under cleaning cycles. Pay attention to alignment tolerance and thermal stability—small decenter or temperature shifts affect spot size. Quantify manufacturing variability when comparing units; accept only units meeting tight MTF and centration specs. For photographers seeking improved framing and real-time monitoring, consider pairing the reducer with an external camera monitor to better judge focus and composition external camera monitors.
Compatibility and Step-by-Step Installation Tips for Celestron SCTs
Having established how the reducer alters focal length and flattens the focal plane, now focus on whether and how it mates to your Celestron SCT and the stepwise actions for a clean, repeatable installation. Align reducer to rear cell or reducer plate, engage mount threads until hand-tight; verify knurled housing seats flush. Attach T-adapter or visual back, then camera/diagonal. Use coarse then fine manual focus; apply focusing tips like short inward/outward sweeps and confirm with live histogram. Monitor temperature effects — refocus after thermal shifts. Check backfocus management: measure from sensor to corrector spec, iterate spacing with shims or extension rings. Consider adding a top-handle or similar accessory to improve camera grip and reduce strain when mounting and balancing the camera.
Imaging Tests and Visual Use: Sample Targets, Exposure Savings, and Star-Field Edge Performance
Although the reducer shortens focal length by 37%, you’ll immediately notice practical gains in imaging speed and field coverage that change how you plan exposures and target selection. You can frame large nebulas (M31, M42) and compact galaxies with fewer subs; short exposure savings are quantifiable — roughly 0.63× exposure time for equivalent SNR — letting you stack more frames to combat seeing. Visual use yields lower magnification and comfortable framing for star clusters. Measure edge star elongation across the sensor: well-corrected center, mild elongation near extreme corners on full-frame; crop or use smaller chips to eliminate residual aberration. Consider pairing this with secure NAS storage to safeguard your high-quality frames and manage growing archives.
Pros, Cons, and Buying Recommendation: Value, Alternatives, and When to Skip It
The imaging and visual results above set the stage for a clear weighing of pros, cons, and purchase guidance: the Celestron reducer delivers a compact, well‑corrected field and a 37% focal‑length/f‑ratio reduction that materially speeds exposures and widens framing, yet it introduces mild corner elongation on full‑frame sensors and requires manual focus adjustments. You’ll value faster integration times, robust coatings, and mechanical fit across Celestron SCTs for cooler astrophotography workflows and practical terrestrial use. Downsides: residual edge astigmatism on large sensors and lack of motorized focus. Buy if you need speed and field; skip if you demand pristine full‑frame corners. Use beginner troubleshooting tips. This makes it a practical choice for photographers focused on color calibration and accurate color rendering.
Some Questions Answered
Can I Use This Reducer With Non-Celestron SCTS via Adapters?
Yes — you can use this reducer with non-Celestron SCTs via appropriate adapters, but you’ll need to verify adapter compatibility and maintain precise optical alignment. You’ll attach the reducer to a matching rear cell or adapter that fits your tube, then check spacing to achieve correct back focus. Small mismatches can introduce tilt, vignetting, or degraded stars, so you’ll want high-quality, well-centered adapters and iterative focus/alignment checks for reliable imaging.
Does It Affect My Telescope’s Backfocus Requirements for Cameras?
Yes — it changes backfocus needs. The reducer shortens effective focal length and shifts the ideal camera spacing, so you’ll need to maintain the specified camera spacing from the reducer’s shoulder to your sensor for proper corner-to-corner correction. That means accounting for flange adaptations (T‑adapter, DSLR flange, or custom spacer) when calculating total backfocus. Measure and stack adapters precisely; small errors will introduce field curvature or coma.
Is Autofocus Possible With Motorized Focusers Attached?
Yes — autofocus compatibility is achievable with motorized focusers, but you’ll need to manage motor backlash and backfocus precisely. The reducer/corrector is passive optically, so a quality motorized focuser can drive routine autofocus routines. Calibrate backlash compensation in your focuser/controller, confirm full travel reaches the new reduced focal plane, and use fine-step control during focusing. If backlash isn’t addressed, hunting and focus errors will degrade repeatability and star sharpness.
How Durable Is the Anodized Finish Against Field Wear and Dew?
You’ll find the anodized finish resilient: surface hardness resists minor scratches and abrasion during normal field use. Coating longevity is strong given aluminum substrate and black anodize; it tolerates handling, dew exposure, and occasional wiping without rapid degradation. Still, prolonged wet/dry cycles and abrasive particles will eventually wear it—use silica desiccants, gentle drying, and avoid rough threads to maximize lifespan and maintain optical/mechanical performance.
Can I Stack Filters Behind the Corrector Without Vignetting?
Yes — you can stack thin filters behind the corrector, but you’ll want to control spacing to avoid vignetting. Place filters close to the camera or diagonal where the light cone is narrower; keep combined glass thickness minimal. Expect slight transmission loss with each element, so account for added exposure time and potential color shifts. Test empirically for your setup: filter placement, spacing, and sensor size determine whether full-field illumination is preserved.