You’ll get a 20×20×20 cm (20″x20″) foldable light box with a 160-LED bi‑color array (3000–6500K), a dimmerized 12V adapter, diffusion cloth and four thicker water‑resistant PP backdrops. The silver‑film interior and high‑CRI LEDs deliver stable, even illumination with minimal hotspots and reliable white balance for eCommerce and small‑gear shots. It’s portable, quick to set up and limits macro/jewelry specular control without extras — keep going to see setup tweaks and alternatives.
Some Key Takeaways
- 20×20×20 cm (approx 8×8×8 in) vs 20×20 in: ensure dimensions match your needs; this product is 50×50×50 cm (about 20×20×20 in).
- Built-in 160-LED bi-color array (3000–6500 K) with dimmer delivers high CRI (>90) and consistent, flicker-minimal lighting.
- Includes four water-resistant PP backdrops (white, black, orange, blue) with Velcro for fast swaps and minimal creasing.
- Foldable, tool-free setup and multiple shooting windows speed eCommerce workflows but limit macro detail for very small items.
- Best for small-to-medium product shots; professionals needing ultra-high CRI or larger setups should consider bigger or premium alternatives.
What You Get in the 20″x20″ Light Box Package
When you unpack the ZK-RY-09 20″x20″ light box, you get a ready-to-use, foldable studio that includes the main 50×50×50 cm enclosure, a micro USB Type B 12 V DC power adapter with an adjustable-knob dimmer, a diffusion cloth, a user manual, and multiple backdrops — four thicker, water-resistant PP sheets (white, black, orange, blue) attached by Velcro, though the package contents also reference six backdrops in some listings; the interior is lined with high-reflective silver film and the built-in 160-LED bi-color array (3000–6500 K, CRI 90+) provides even, dimmable illumination for front and top shooting through dedicated windows. You’ll find included accessories clearly itemized; packaging quality is compact, protective, and minimizes deformation during transit. The site Perfect Light offers related accessories and guidance for choosing the right product photography box, helping buyers compare features like size, lighting, and backdrop options with confidence, especially when selecting a product photography box.
How the ZK-RY-09 Lights and Materials Perform in Real Shoots
The ZK-RY-09’s 160-LED bi-color array delivers stable, even illumination that’s easy to shape for product shoots: you can dial color temperature between 3000–6500 K and adjust brightness precisely via the adapter knob, yielding consistent exposures without flicker and with a measured CRI above 90 that preserves color fidelity. In practice, color uniformity across the 50×50 cm interior minimizes post-processing; hotspots are rare thanks to the silver-film diffusion. Thicker PP backdrops resist creasing and water damage, showing notable material resilience during handling. Overall, lighting control and durable surfaces let you capture repeatable, high-fidelity product images efficiently. This setup is ideal for photographers who want consistent results with small to medium-sized items and a professional-looking light box photo tent.
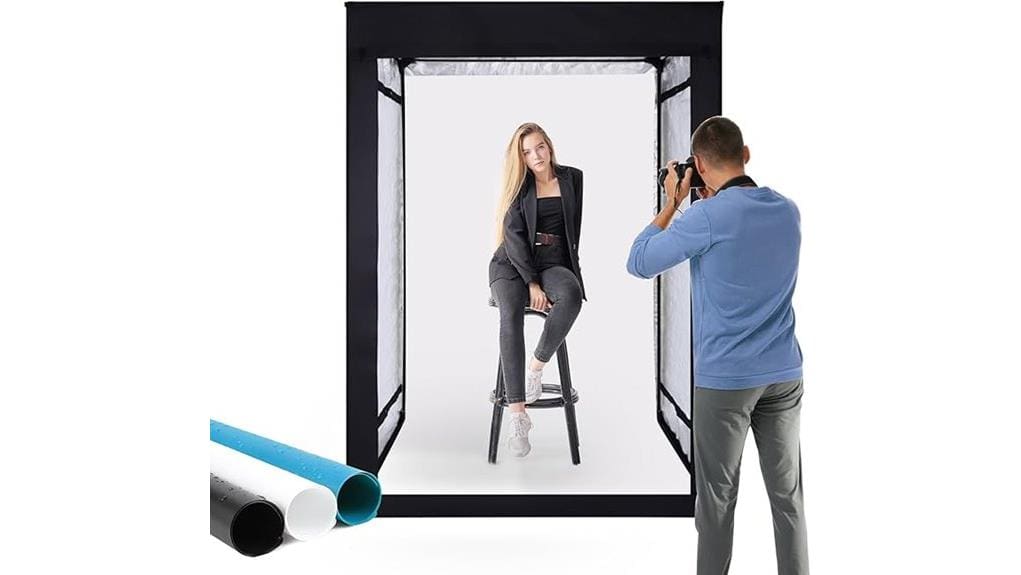
Setup, Shooting Angles, and Step-by-Step Shooting Workflow
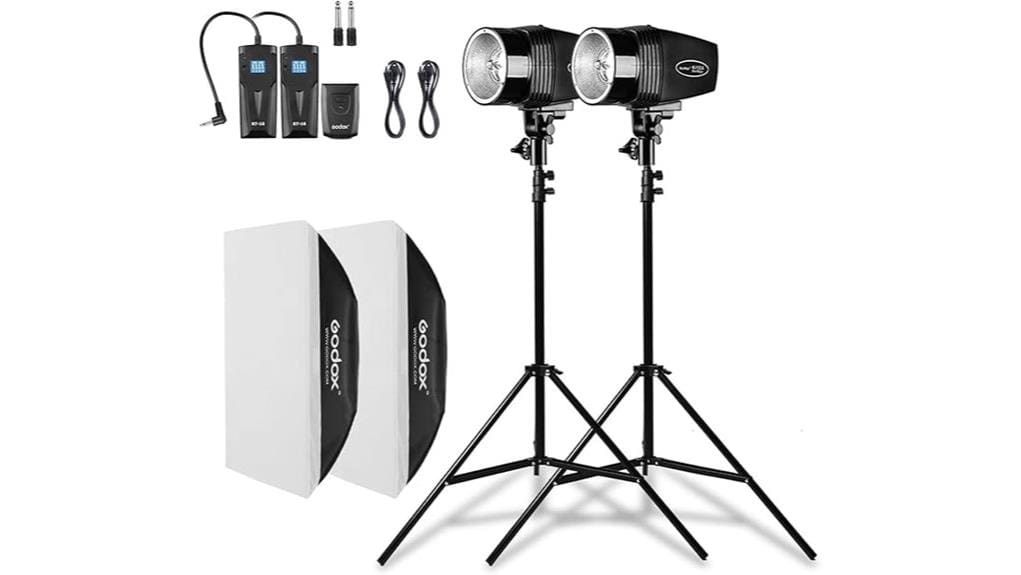
Although it folds together for storage, set up the ZK-RY-09 on a stable, level surface and unfold the one-piece board so the interior faces you, then secure a chosen PP backdrop with the Velcro strip and orient the top and front shooting windows for your planned angles. Position your camera on a tripod, verify camera positioning relative to product center, and lock height and tilt. Route the 12V adapter, set LED color temp and brightness, and add diffusion cloth or reflectors as lighting modifiers. For each shot, run a focus and exposure test, record settings, adjust angle, and capture bracketed frames. Consider also matching your lights to a complete studio lighting kit to ensure consistent color temperature and versatile modifier options.
Pros and Cons for Common Use Cases (eCommerce, Jewelry, Small Gear)
Because you’ll be pairing this 50 cm foldable light box with different subjects, assess strengths and limits per use case: it delivers high-CRI, bi-color LED lighting with even diffusion and adjustable brightness that’s ideal for consistent eCommerce product shots and small-gear documentation, its multiple shooting windows and Velcro-backed PP backdrops speed workflow, but the interior size and fixed enclosure geometry constrain very small-item macro detail (e.g., fine jewelry) unless you add macro lenses, close-up lighting modifiers, or supplemental external lights to avoid loss of micro-contrast and specular highlight control.
For eCommerce lighting you’ll get repeatable white balance and low vignetting; use top window for dimensionality. For jewelry highlights expect limited specular control—use pinpoint LED or polarizers. For small gear it’s efficient; larger items may crowd frame. A collapsible reflector can complement this setup by helping shape and fill light with portable convenience and quick placement collapsible photo reflectors.
Who Should Buy This 20″x20″ Light Box : Budget and Alternatives
While you’re on a budget and need consistent, high-CRI lighting for product shots, this 20″x20″ (50×50×50 cm) foldable light box fits most small-to-medium eCommerce, hobbyist, and documentation workflows—its 160 bi-color LEDs (3000–6500K, CRI 90+), adjustable dimming, and reflective interior deliver repeatable white balance and even diffusion, and the included Velcro PP backdrops and multiple shooting windows speed throughput. You should buy it if you’re a budget buyer needing portable, tool-free setup, reliable color, and versatile shooting angles. Professionals requiring larger studios, ultra-high-CRI sources, or brand-specific mounts should evaluate alternative brands and larger rigs. This compact setup also pairs well with seamless paper backdrops for expanded background options and an easy transition to full-frame backdrop styling.
Some Questions Answered
Can I Power the Light Box From a USB Power Bank?
Yes — you can power it from a USB power bank, but check specs first. The box requires 12 V DC via Micro USB Type B and draws LED current; many power banks only provide 5 V USB out. Use a cable adapters solution (5 V to 12 V boost converter or a power bank with 12 V output). Watch battery limitations: runtime depends on capacity and converter efficiency; avoid undervoltage to protect LEDs and adapter.
Are Replacement Backdrops Available Separately?
Yes — you can get replacement backdrops separately. You’ll find the thicker PP panels in the original colors (white, black, orange, blue) and sometimes extra fabric textures or color gels sold as accessories for creative effects. Verify Velcro compatibility and dimensions (50×50 cm interior). Check the seller for exact pack contents, material specs, and warranty coverage; request matching PP thickness and water-resistant ratings to maintain consistent lighting and contour rendering.
Does It Fit on a Standard Tabletop or Desk?
Yes — it fits comfortably on most standard tabletops and desks. At 50 x 50 x 50 cm (about 20″ cube) you’ll place it without overhang on typical 24–30″ deep surfaces. Its one-piece foldable design makes it tabletop friendly and easy to set up or store. Make sure your desk depth and clearance for top-shooting access; allow extra rear space for the power adapter and cable routing.
Is the Enclosure Safe for Continuous Overnight Use?
Yes — but cautiously. You’ll want to make sure the ventilation design isn’t obstructed: keep the micro USB power adapter and LED panel exposed to airflow, avoid enclosing the unit in tight cabinets, and don’t drape heavy fabric over vents. With its low-voltage 12V DC, high-CRI LEDs and reflective interior the fire risk is low, yet continuous overnight use still warrants periodic checks and placement on non-flammable, heat-resistant surfaces.
Can I Mount External Flashes or Strobes to It?
Yes — you can use external flashes or strobes, but you’ll need care. The tent lacks built-in hot shoe mounts, so you’ll attach flashes to stands outside the enclosure or use bracket arms through shooting windows. Use light modifiers (softboxes, diffusers, grids) outside or at the openings to preserve even illumination. Avoid direct bare flash inside to prevent hotspots and heat buildup; keep distance and monitor temperature during extended use.